
Hi there! and welcome to my blog~ How is your week going thus far? I hope you are not buried in snow! : l My heart and prayers go out to you in the eastern part of the US~
We are having mild winter weather in Colorado USA right now. Cold and dry. So typical this time of year. *sigh*
I would welcome rain OR snow! We really need the moisture here~
Please let me share with you a project I undertook last year.
I love to read. And not just on my Kindle : ) Although I do love that too~ I like the feel of a real book in my hands. I like bookmarks! and how a book sitting on the table reminds me to read.
Well, I have a bookcase in my bedroom which was very - - unsightly!
With books of all shapes, sizes and colors - it just bugged me. I had seen several articles and 'Pins' about covering books - so I decided to try my own idea!
Works so well - with just a few steps~
I'm not a very good "teacher!" but let me try to explain what I did. (Perhaps I should have taken pictures along the way! (:z hello, Karen?) But I was on a mission! and didn't think to share this until it was done~

1) I measured the height of the book and cut the paper to fit exactly.
2) I measured all around the width of the book, adding about 2 inches to each side (width-wise) for 'fold over.'
If the paper wasn't 'wide' enough to wrap around the book, I zig-zag stitched strips of coordinating paper to extend the width. Click on the photo below and I think you can enlarge the photo. *note - I did not overlap the papers; I 'butted' them up against each other and zig-zag stitched them together~
3) I then 'wrapped' the paper around the book and mark where the folds should be. *I used a scoreboard for crisp 'fold' lines; but you could just draw a pencil line on the inside of the paper and make your folds 'around' the book.

4) I used Washi tape (it has a light 'tack' and is removable) to adhere the covers to the inside of the book as you can see below. **These are 'every day' books! I wouldn't do this with rare or special ones: )

4) I opted to add strips of white cardstock to the spine with title and author.
I just printed the info on white cardstock and cut them out with wavy scissors : ]
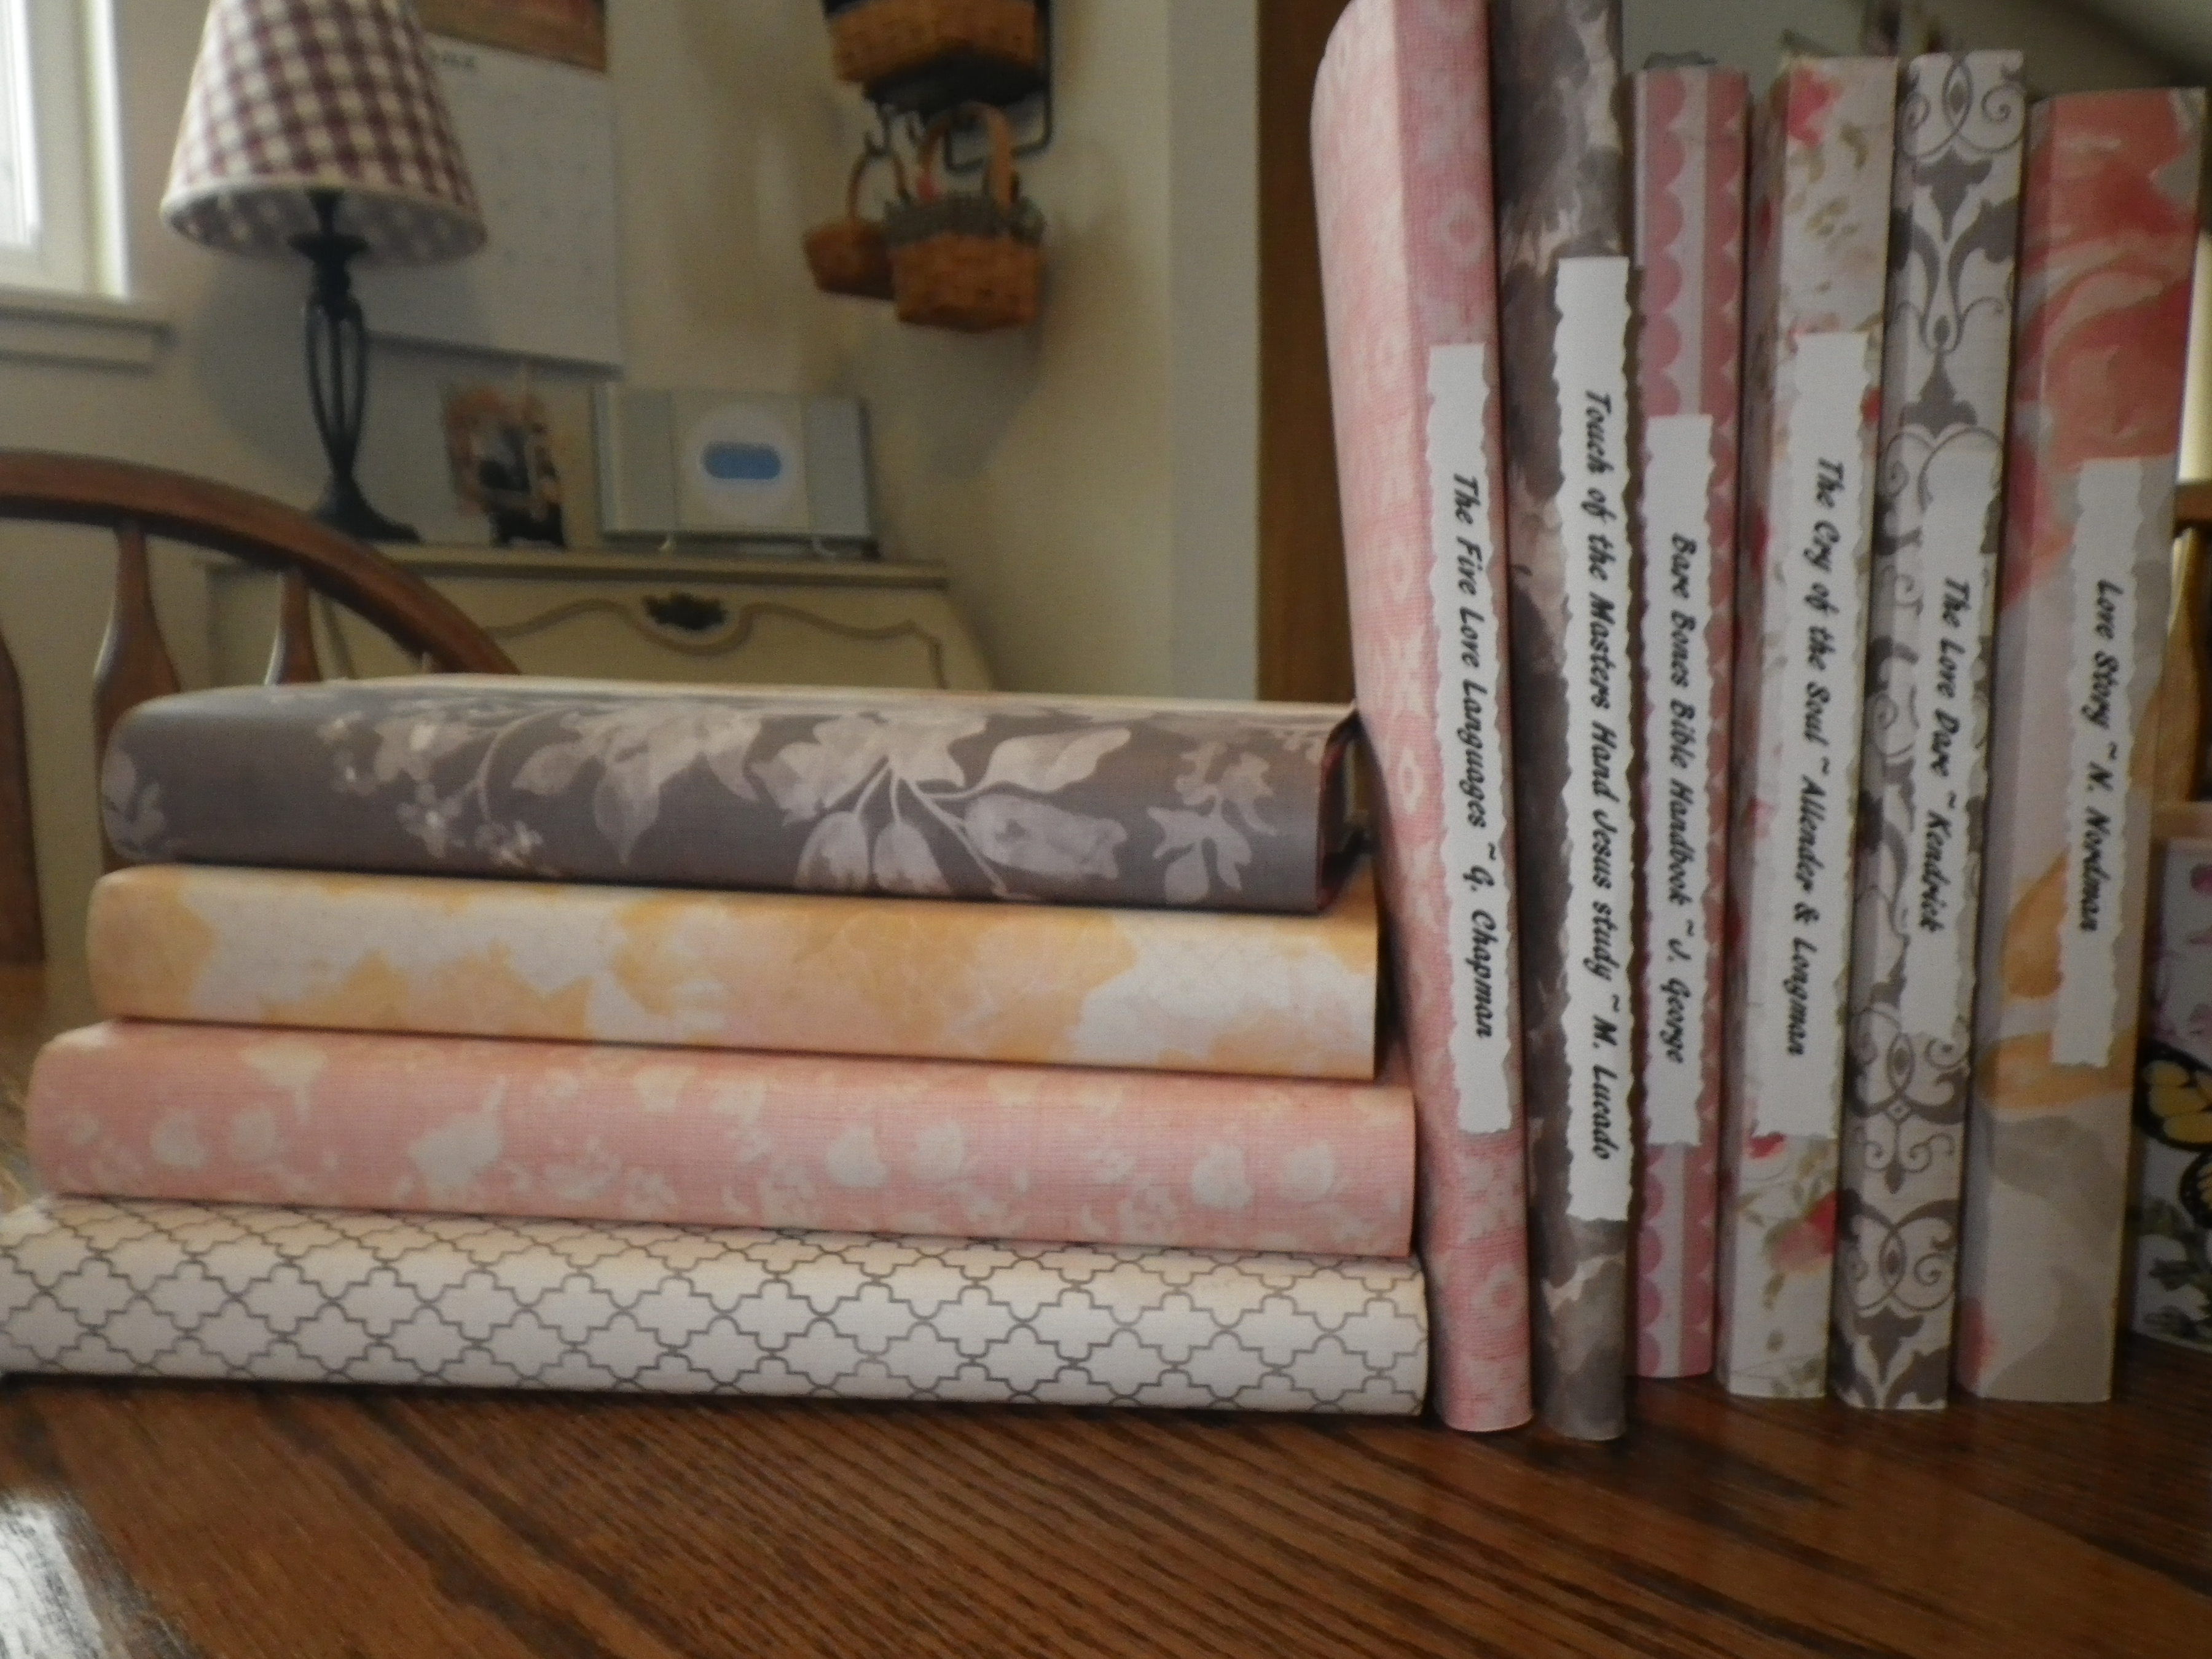

They look so pretty on my bookshelf! Much better than that unappealing eclectic mix~ It brings a sense of 'cohesion' to my bookcase.
If you have any Questions, please feel free to ask. I know my directions are probably lacking.
This was an easy project, really. Took about 6 or so minutes per book, once I got the technique down : ) I ended up covering about 25 books in 2 evenings~
I used:
1 12X12 scrapbook paper pack
1 Lg roll of Washi tape
Scissors
Paper trimmer
12X12 scoreboard and bone folder
*To attach the labels on the spine I used an adhesive runner.
*I did reinforce the stitched seams on the inside (backside that doesn't show) with a strip of Washi as well.
** Remember, these are 'everyday' books!!! Though Washi tape is removable, I would not do this for rare or antique books of course.
Thanks for peeking in! I hope you have a blessed rest of the week~
Karen
How pretty are these! Great idea Karen, and what a great way to use up some scrapbook paper that we all no doubt hoard. Thanks for the tutorial. Have a great week! Hugs, Sue
ReplyDeleteThanks for the visit and comment Sue~ Yes, I have more scrapbook paper than I will ever use in my lifetime! No problem using it up for me. I like to use what I have; and try Not to hoard: ) Have a nice week-end! Karen
DeleteHi Karen, I love this project and using scrapbook papers. You are so talented and design the best ideas. I've used heavy wrapping papers for covers in the past but I like this idea so much better. Looks so nice on the bookcase like you said and having the titles on the spines is a special touch. Thanks for sharing my friend. Hope you are doing well. Have a great weekend ahead. Blessings to you. xo
ReplyDeleteCelestina you are a peach! Thanks for the visit and comment! Means a lot 2 me~ I liked the idea of using S.book paper to cover the books because each book looks different; but coordinated! : ) Blessings to you for a nice weekend~ Karen
DeleteBeautiful paper pack to do this with and I like your idea of zig zag stitch if you needed a larger piece. Great idea for the washi tape also and gives it a pretty clean look on the inside too. Pretty idea!!
ReplyDeleteHi there Connie! Thanks for the visit and comment~ I appreciate you! Had fun with this book cover idea. Have a blessed week-end friend! ~Karen
DeleteSo pretty! I would much rather look at this too!
ReplyDeleteJacqueline, thanks ever so much for stopping to comment! Yes, my book shelf holds some of my precious reading material; but - -ugh, those covers! LOL This coordinating paper really did the trick for me. Harmony on the bookshelf now- ahhh : ) Have a great week-end! Karen
DeleteHi Karen,
ReplyDeletewhat a great idea and so pretty.Thanks for the tutorial.
Have a great weekend.
Hugs,
Marie
Thanks Marie! I appreciate your comments always~ Your artistry is such an inspiration to all of us out here ; )! Hope all is well for you, Karen
DeleteThese are all so beautiful! I love the papers you selected. I also noticed all the lovely Longaberger's! I used to be a consultant back in the early 90's and at one time had 86 of them. I have been slowly selling them and downsizing, but they sure are lovely! Have a great weekend!
ReplyDeleteThanks so much Nancy! I had fun with this book covers project :J I have family in OH and one was a Longaberger consultant as well~ So I've been blessed with lots too. I've downsized a bit - - by giving some to my 2 daughters'! LOL I dearly enjoy my baskets friend~ Happy day to you, ~Karen
DeleteFabulous idea and your book covers are wonderful.
ReplyDeleteHugs Diane
Hi there Diane! Thank you for the visit : ) I appreciate you so much~ I was enjoying your beautiful Valentine cards on your blog! Such creative work~ Karen
DeleteWonderful look. So pretty, lined up together!!
ReplyDelete